
I'm not sure how much use a two-year old PC build is going to be to anyone, but damn it, I took pictures (which made this take at least twice as long) and pictures demand to be posted, even if they are just accidental Half Life 2 screen shots... Huh? Oh yeah, PCs! So, after quite a few years of faithful service, and a fair few upgrades, I was finally starting to hit some walls with the Dell Dimension 9200 I got back in 2007. I can't say I had any immediate plans to put together a new PC, but then I came across a couple of articles on the best new parts to get, started browsing around Amazon. One thing led to another and the next thing I knew, PC components were arriving in the door.
Here's what I got:

AsRock Z77 Pro4 Motherboard - £92.37 (€107.21)
For the motherboard, the Z77 Pro4 seemed to strike a good balance between performance and price. However, if I'd known that there was another one in the same range with a freaking floppy connector, firewire and goodness knows what other dumb stuff crammed in there, in 2013!, the allure of having all that archaic technology in my PC may have proved too much.

Intel Core i5-3570K 3.40GHz SKT1155 6MB Cache - £175.42 (€203.49)
The Core i5 3570 seemed to be another solid, mid-range choice for the CPU.
HyperX Black Series 16 GB Gaming Memory Kit (2 x 8 GB) - £70.21 (€81.49)
Memory-wise, I've usually go with Kingston and this turned out to be no exception. I didn't know HyperX was just a sub brand at the time though; it just seemed to be a cheaper, well-reviewed alternative.
Actually, I was thinking about cheaping out even more on the memory here. 8 gigs seemed like it'd be plenty, at least for a while, so I was going to go for two 4 gig DIMMs here. The problem with that is that I'd be throwing those out if I ever decided to max out the motherboard's memory to the full 32 gigs it supported (and after doing that with my last PC, it was certainly a possibility). Seeing as they were only slightly more expensive, the 8 gig sticks felt like the smarter investment here.

Asus Radeon HD 7770 (1GB GDDR5) - £97.23 (€111.21)
Ooh, a controversial choice for the GPU: AMD and a budget card. :D I was trying to keep my budget under control here though, and with amount of time I spend playing graphically intensive PC games (hell, I barley play any PC games these days. Doesn't stop me from buying them though.), this card seemed like it could handle anything I'd be likely to throw at it for the foreseeable future.
WD Black 3.5 inch 1TB SATA Hard Drive -£71.71 (€82.29)
For the hard drive I wanted something reliable. I've had pretty good luck with various flavours of Seagate Barracuda over the years, but everyone seemed to recommend the WD Caviar Black, so you'd think that would be a pretty solid choice. You'd think.

LG BH10LS38.AUAU 10x Internal BD-RW Drive - £71.73 (€83.20)
A physical media drive?! In 2013?! What is this madness? I don't know, maybe I'm just crazy, but when it comes to games, music, movies, I think it makes more sense to be able to take advantage of both physical and digital media, rather than putting yourself solely at the whims of rights holders and pirates for your entertainment needs. And look at the price, for a drive that can freaking burn Blu-rays.

Zalman Z12 2x USB 3.0 Midi Tower Case - £54.91 (€63.73)
The case, I think, was probably the thing I spent the most time looking for. There's a lot of choice out there, but generally, most cases tended to be 1. ridiculous looking things intended for someone you know refers to their PC as a "sick rig"; 2. cool-looking, but impractical ones with the disk drives or USB ports hidden behind doors (damn it, when I need to rip my copy of Now That's What I Call Music 1983, I don't want to be opening doors. I need immediate access to that disk drive. Love Town by Booker Newberry III isn't going to listen to itself, you know.) or 3. butt-ugly black boxes. This one had a bit of style, while also being nice and practical. Plus it came with two fans included. That seemed like a nice bonus...

NOCTUA 120x120x25 NF-P12 Fan x 2 - £35.00 (€40.46)
...until I powered them up for the first time. Several of the reviews on Amazon and elsewhere commented on how quiet they were. They were like freaking jet engines. And no tinkering with the fan speed seemed to help much. After a few days of that, I decided to replace them with two Noctua fans, which do make a little noise, but it's blissful silence compared to the Zalman fans. Well worth the money. They really are a gross colour though.
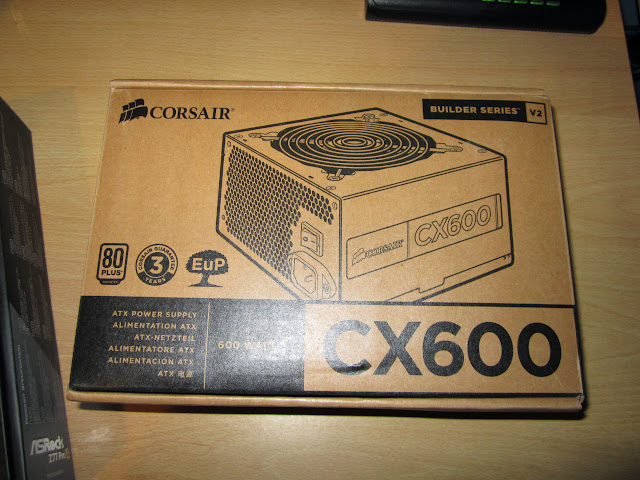
Corsair Builder Series CX 600 - €60ish (in 2011)
And finally, the PSU. Actually, I didn't need to buy a new one at all. I had this sitting around, unopened since 2011. Back then, my Dell was having some trouble that looked like it might have been power supply related, so I picked this up just in case. Ultimately it pulled through and rather than returning this, I thought it would come in handy when I was building it's eventual replacement. What do you know? :D I was a little worried that 600W PSU might be a little underpowered for this new build though, but after some research, I was confident enough that I'd be able to get away with using it. Just about.
On to the build!

Starting off very professionally, I put the case up on my desk next to my old PC. (In the days before I had a tablet, frantically looking something up after everything had gone on fire was a definite possibility.) I cleared all the wires out of the way, connected my new anti-static wrist strap,... and then realised that with the case up here, I actually had no room to put together the motherboard, CPU and RAM together before fixing the whole assembly in here. Screw it, I wasn't moving the case again. Safety be damned, I was taking the most delicate part of this process down to the carpet.

Well, on top of an anti-static bag and the motherboard box. It'll be fine. Probably.
The CPU was the first in: a pretty fool-proof operation, though I have to say pulling down the latch to lock it in place I was still half afraid that it'd snap it in two somehow. :D

The CPU fan was a little trickier actually. There were four plastic pegs that needed to go through the motherboard to hold it in place and two, maybe three of them needed quite a bit more pressure than I was comfortable with putting them under to go through fully.

Next, the RAM, which is always a bit of pain to install inside a case, especially when it's upright. Out in the open here though, it was no problem.

Motherboard assembly complete!

Back to the case and before I put in the motherboard, I screwed in the standoffs that the motherboard screws go into, not paying too much attention to the fact that the case came with standoffs in two different lengths. I can't see how that would be a problem. Also, I put in the back plate that the various mobo external connectors will be accessible through.
So, I fit the motherboard in, tighten the screws and immediately notice that there's a fucking bend in it! Queue panic. :D Of course, I used both types of standoff. Thankfully, I didn't do any damage, although those bloody standoffs are way trickier to remove than to fit.

Okay, motherboard's screwed in, things are sticking out. We're making progress. Time to plug things into connectors.

First up, probably because it was the biggest, the front USB 3.0 header.

Then the rear case fan (prepare for take off),

the front audio,

and the front USB 2.0, I think.This was two years ago.

Next was the front LEDs and power and reset buttons, which I'd taped to the side of the case to keep them together.

It's always a bit confusing figuring out which way to orient these, but this seemed to work. :D

With all the bits and bobs on the case connected to the motherboard now, it was time put in the power supply, which brought in a whole mess of wires, not being one of those fancy PSUs with the detachable cables. In the ever-raging debate of which way to orient the PSU fan, I usually put it facing down. I couldn't tell you if that's a good idea, but it seems to have worked out okay for me so far.

Next up, after much untangling, I hooked up the PSU to the main power connector...

...and the CPU power connector. The cable going here was a two part job for some reason, with a short cable coming from the PSU and a short extension cable on the end of it.
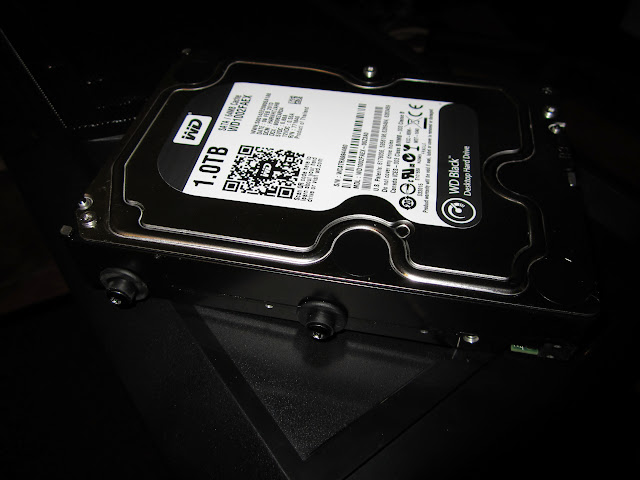
While I was supplying power to things, now seemed like as good a time as any to put in the hard drive, which was a breeze here compared my old PC and fiddling around, screwing plastic enclosures on. Here you put screws (and anti-vibration grommets) on two of the holes on each side. Then you just needed to slide it into one of the drive bays until it locked into place.

In go the power and SATA cables. And with that, the PC should be operational. Much to my relief, it was. This was where I clocked off for the night from building and set about installing Windows and the like (from Blu-ray drive I assume I installed at some point too. :D). I wasn't entirely finished with the build yet though.

A couple of days later, I got my graphics card in the post. As a (somewhat) modern card, of course it took up two PCI slots on the back, so I set about breaking off a couple of the place-holder bits on the case to allow the card's connectors to go through. Unlike my last couple of PCs though, this case came with no replacement covers for these slots, so if you did something dumb like...

...oh I don't know, breaking open two slots in a spot that the card won't fit and then having to move down to break open another one, you might well be left with a gap or two on the back of your case.

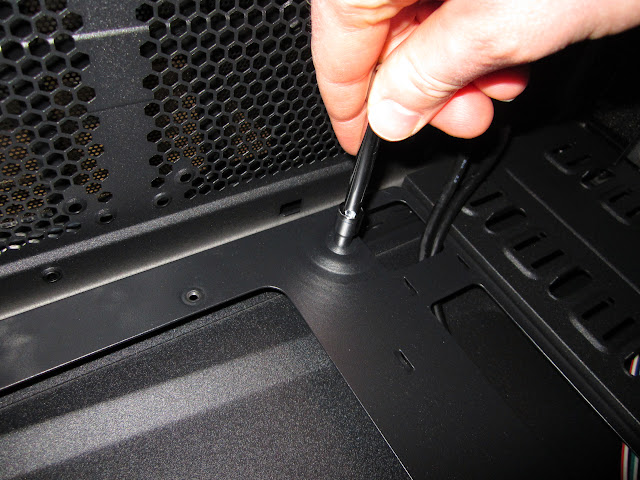
The following week, the long-awaited Noctua fans arrived and I immediately set about ripping those freaking Zalman ones out of there. Rather than screws, these had slightly odd, apparently vibration-cancelling rubber fittings.

You put them in through the case...

...and pull them out through the hole on adjoining side of the fan, which was a bit of a challenge actually, especially on this rear fan with everything else already installed in the case. I really had to stick my head in here and get a big pair of tweezers at it. But it was worth it. Silence at last.

And finally, the last piece of the puzzle: a card reader. This is actually just the old old one from my Dell. Man, if you'd have told me in 2007 that I'd ever have any use for this, let alone be moving it to a new PC in 2013, I'd never have believed you. Over the years I've found it super handy though. Yeah there are always alternate ways to access memory cards in phones, cameras, PSPs etc. but it saves so much time to yank the card out of one of those and just whack it in here.

So in this case there are four 5.25" bays on the front, one with a 3.5" adapter tray and a matching 3.5" slot on the front panel for the card reader to go through. They're really into breaking bits of metal off this case, aren't they?

Before I was able to put the card reader in the appropriate bay, I needed to fix it onto the adapter tray with a few screws. Seems like a simple enough job...

...but it proved surprisingly tricky to hold the reader so that the holes lined up while I fiddled with the screws through this little opening.

Finally.

I slotted the tray in, popped the the reader into a spare internal USB connector...

..and I was good to go. Well, minus the front panel.

Two years later, and my build is still going strong. (Yes, that is indeed a floppy drive. I found a way!) As I kind of alluded to earlier, the only major problem I've run into with it was that WD Caviar drive. For all the cautionary tales I've heard about Seagate's drives over the years, I've never seen one get as messed up as this did and, though I didn't realise it at the time, it started going bad almost straight away. I'm quite lucky it was just programs I had on there. I've returned it since, and I might be dicing with disaster here, but I replaced it with 2GB Seagate Barracuda with no problems to report since. To be fair though, the 2TB WD Green drive I put in a little later for extra storage is still working just fine.
The card reader I've replaced too, actually a few times. While there was nothing wrong with the old Dell one, it didn't support SDHC cards, so I needed an upgrade. I went with an Akasa AK-ICR-07 first, which seemed like a good, cheap and cheerful upgrade. That failed in a month. :D Next, hoping that a more expensive one would last a bit longer, and of course, being a fan of having as many obscure card slots available as possible I went for an Icy Box IB-864. That failed after ten months. Thinking that I just got a busted one, I then foolishly ordered another one of those, which this time only lasted six months. Finally, in desperation, I found this StarTech one, which I've had just over a year now and thank goodness, it's still working. I just pulled the picture above off of it in fact. (See what I mean: so much easier!)
No comments:
Post a Comment